Product Overview
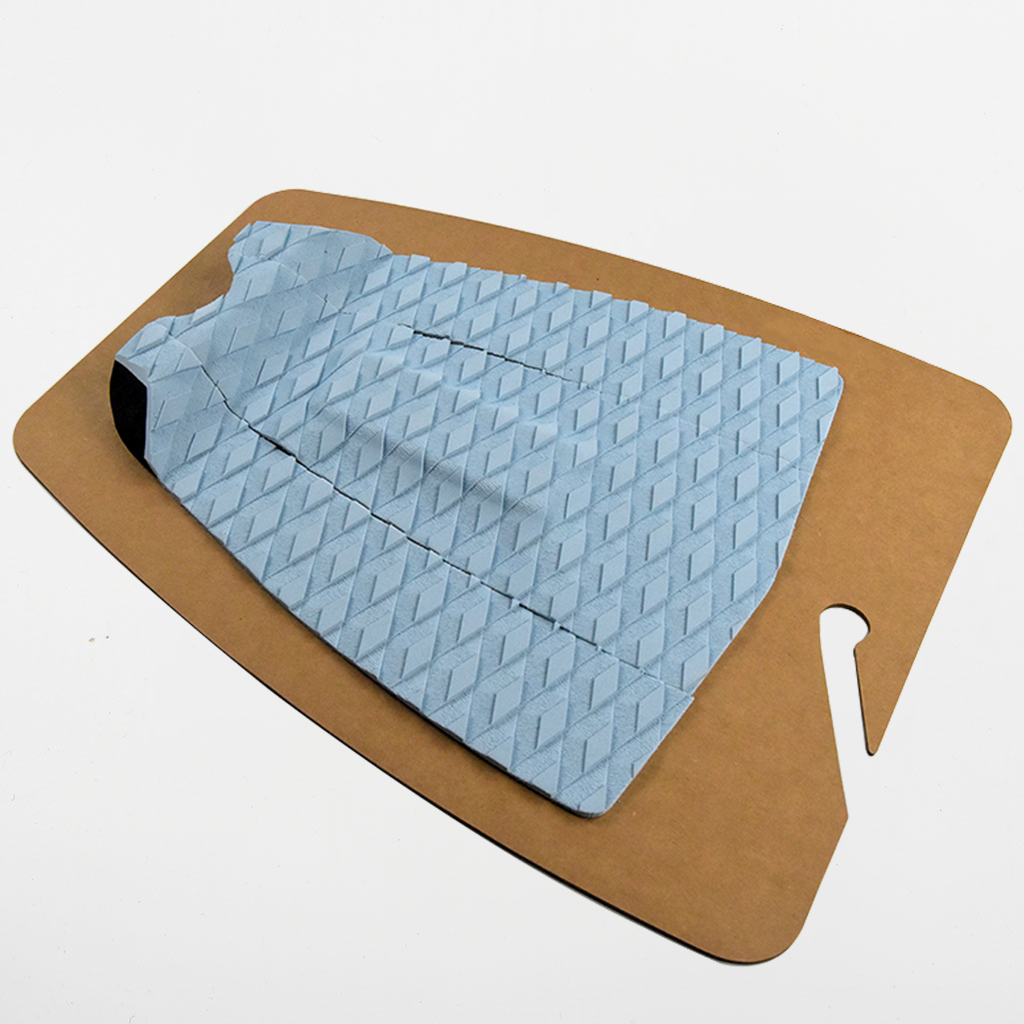
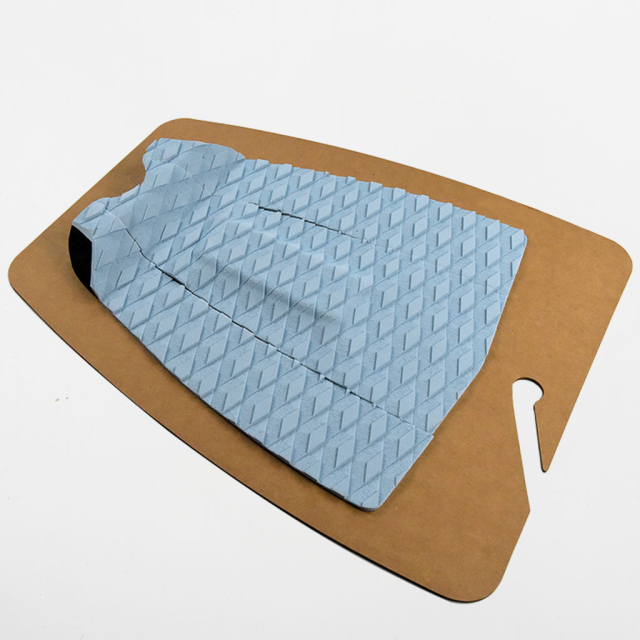
This surfboard traction pad covers the rear of the deck — the section the back foot drives off through every turn. The outline is contoured rather than square, so it follows the taper of the tail instead of hanging over the rail, and the grip face is split into panel sections with a diamond-embossed, matte texture. The design shown here sits in light blue, and it is a stable shape rather than a seasonal cut, which matters when you are reordering a pattern that already sells on your shelf. Most pads leave us as replacement grip. A rider's original deck pad has gone smooth under the heel, lifted at a corner or worn through where the foot pivots, and the board needs to go back in the water without a repair. The same pad goes onto new boards as well, fitted by shops finishing a custom order or by board builders before a board is collected. There is nothing to adjust after fitting, and nothing to maintain beyond keeping it clean and out of the sun. We supply it to chain accounts, distributors and private-label buyers, either as a single design or as part of a full accessory order.
Back-Foot Control
- Weight transfer at the pivot point. The pad sits where the back foot lands when weight shifts rearward, so the tail stays loaded and the board pivots off a planted foot rather than a sliding one.
- A contoured edge the foot can read. Because the outline tapers with the tail instead of sitting square, a rider can feel where the pad ends without looking down.
- Ridges for lateral push. The gaps between the panel sections give the foot a series of edges to push sideways against when a turn tightens and the back foot has to hold its line.
- Bite in both directions. The diamond-embossed face grips fore and aft as well as side to side, which matters when weight moves back over the tail and forward again through the exit of a turn.
- Cushion without a vague feel. There is enough give underfoot to soften a hard landing, but the pad does not mush under the arch, so it still tells the rider what the board is doing.
- The same feel board to board. A shop or rental fleet fitting several boards gets a consistent footfeel when the same surfboard tail pad goes on each one, so riders switching boards are not relearning the deck.
- Works from a first board to a full quiver. The shape suits a rider moving off a plain deck for the first time as well as an experienced surfer who wants a defined edge under the back foot.
Fitting & Placement
- Work on a clean, dry deck in the shade. Strip the old pad and any adhesive residue first, because a new pad only sits as flat as the surface under it.
- Set the surfboard tail pad in place dry before you peel anything. Check that the contoured outline follows the tail taper and sits inside the rail line, then mark the front edge with tape.
- Wipe the deck down with a suitable cleaner and let it dry completely. Wax, dust or release residue left on the surface is where lifting starts.
- Peel back a short section of the backing at the tail end, press that end down, then work forward, peeling and pressing as you go rather than peeling the whole backing at once.
- Press from the centre of each panel outwards to chase air towards the edges, then run a thumb along the outline to check the pad has not bridged across the stringer or any channels.
- Leave the board to sit before it goes in the water, and follow the adhesive maker's cure guidance rather than guessing at a time.
- The same sequence works whether you are fitting a shortboard pad or a longboard traction pad — the difference is only where the front edge is marked.
- Shortboards and hybrid shapes. The contoured outline is cut for a normal tail taper. Lay the pad on the deck dry and check it sits inside both rail lines, with the front edge roughly a hand's width forward of the tail block, before you peel the backing.
- Longboards and mid-lengths. Set the tail piece where the back foot actually lands and check the dry fit with your stance marked. The shape is cut for the back-foot zone, so fit it there rather than trying to extend it up the deck.
- Wide and swallow tails. On a wider tail the pad often sits further back than it would on a shortboard. Mark the front edge where the back foot actually lands, not where the pad looks most centred.
- Narrow tails and step-ups. If the tail is narrower than the pad, trim from the inside edge and take off a little at a time, testing the dry fit after each cut so the outer outline keeps its shape.
- Concave, channels and stringers. Press each panel from the centre outwards so the adhesive follows the deck contour. A pad bridged across a channel or a deep concave will lift at the edges once the board is in the water.
- No wax on the pad. The area a surf traction pad covers is ridden bare — that is what the diamond-embossed face is for. Wax softens in the sun, fills the pattern and leaves the surface slick, so keep it off the pad entirely.
- Waxing the rest of the deck. Mask the pad edge with tape while you wax the forward deck, and comb wax away from the pad rather than into it. Wax residue sitting against the edge is a common starting point for a lifted corner.
- Mixed quivers and rental racks. Shops and surf board manufacturers fitting several boards in one session can run the same surfboard tail pad across the shortboards, so the footfeel stays consistent from board to board.
Care & Replacement
Salt is the main enemy of the texture. Rinse the tail with fresh water after a session and let the board dry before it goes back in the bag; sand and dried salt left in the diamond pattern polish the surface until it stops biting. A soft brush and fresh water handle routine cleaning — solvents, acetone and abrasive cleaners attack both the surface and the adhesive under it.
Heat is the second thing to watch. A board left in a hot car or standing in direct sun is the usual reason a pad lifts at the edge, because the adhesive softens and the pad creeps. Store boards dry, out of the sun, and stacked so that nothing heavy presses on the grip.
Wear shows up in a predictable order: the heel area flattens and goes shiny first, then the edges begin to lift, then the whole pad feels slick underfoot even when it is clean. A lifting corner can be cleaned, dried and pressed back down; once the texture has polished smooth, replacement is the only fix.
Shops that refit decks in volume, and surf board manufacturers finishing boards in a batch, do better working on fully dry boards in a shaded area and fitting several pads in one session rather than one at a time.
Specifications at a Glance
| Product type | Surf traction pad |
| Design reference | 00554 |
| Deck position | Tail section of the surfboard, under the back foot |
| Outline | Contoured to follow the tail taper |
| Grip texture | Diamond-embossed |
| Surface finish | Matte, low glare |
| Panel layout | Segmented sections inside the outline |
| Colour shown | Light blue |
| Backing | Self-adhesive, peel and stick |
| Fitting | By hand, no tools, no assembly |
| Packaging | Cardboard backing card |
| Hang hole | Punched for peg and hook display |
| Board types | Tail decks of shortboards and longboards |
Companion Accessories
- Surf leashes. Hypalon leashes run from a 6 ft 6 mm model for small to medium waves up to a 9 ft 8 mm model for a longboard or bigger conditions, so the leash can be matched to the board on the same order.
- Fins. Honeycomb fins in single tab and double tab fit the same display wall as the pads, and the light construction covers a range of conditions.
- Wider traction. Longboard traction pads, skimboard pads and waxless pads fill the gaps around a tail pad build where riders want extra grip on the deck.
- Covers. Basic bags, regular bags, stretch covers and board bags protect a freshly fitted pad in transit and keep it presentable on the shelf.
- Racks. Travel rax and tie-downs, storage racks, display racks and bike racks cover both the shop floor and the customer who stores boards at home.
- One shipment for new builds. Board builders and surf board manufacturers usually take pads and fins together when finishing boards, and putting both on the same order saves handling at both ends.
Ordering & Confirmation
- Tell us which design you want matched — the code, a photo of a pad already on your shelf, or a physical sample if you have one to hand.
- Describe the boards it will be fitted to, so we can check the outline against the tail width and shape you are working with.
- Confirm the colourway and, for private label, the branding that goes on the pad and on the backing card.
- Confirm how it should be presented — hanger card or bulk packing — along with any carton marking you need.
- Confirm order volume, delivery schedule and terms with your sales contact; those are set per order rather than fixed on this product.
- Ask for the full accessory list if you want everything in one shipment. Buyers building a traction pad for surfboard range usually add leashes, fins, covers and racks at the same time. Surf board manufacturers often combine pads with fins for boards going out the door.
Scale & Supply Capability
CIMI is a factory-based supplier with 16 years in surf and watersports hardgoods, manufacturing at our own facility rather than sourcing through traders. Chain stores, supermarkets and surf-brand stores buy from us because one supplier covers a full accessory assortment, so a season's order and its reorders can be planned together. We take on OEM and private-label work, adapting designs, colourways and branding to your programme, and we schedule production against your agreed range plan. Send us your buy list and target dates, and we will confirm what we can make and when.
FAQ
Which part of the deck does this pad cover?
Only the tail — the rear section of the deck, finishing at the tail block. It is not a full-deck grip; if you want one continuous surface across the whole board, the hexa board grip is the product to look at. A surf traction pad like this one is usually fitted on its own, with the rest of the deck left bare for wax.
Will the diamond texture suit bare feet and wetsuit booties?
The pattern is embossed deep enough to give a bare foot something to push against without feeling like sandpaper, and it still registers through a bootie when the water is cold. A traction pad for surfboard use has to work in both conditions because riders change footwear with the season. If you want to judge how aggressive the texture is, ask your sales contact about sample availability and stand on one before committing to a volume order.
How does this pattern compare with the other tail pads you make?
It is one design in a wider tail pad range, so the difference sits in the pattern and outline rather than in how the pad is fitted. This one uses a segmented face with a diamond-embossed texture and a light blue finish; other designs carry different surface patterns and shapes. If your shelf needs contrast, ask for the full design list and we will send the current set so you can pick a surfboard traction pad that does not duplicate what you already stock.
Will it work on a longboard?
A longboard has far more bare deck ahead of the tail, so a tail pad on its own leaves most of the standing area uncovered. Riders on longer boards usually go for a longboard traction pad or a centre pad set to cover the forward area, and keep the tail pad for the section under the back foot. Tell us the board length and we will point you at the right combination.
Can I trim the pad to fit a narrow tail?
The outline is contoured to follow a tail taper, so most boards take it as supplied. Trimming is possible when you are fitting a surfboard tail pad to something unusually narrow — cut from the inside edge rather than the outer outline, and take off a little at a time so the pad keeps its shape. Always check the fit against the board dry before any cutting.
Does the pad need wax?
No. A surfboard traction pad is designed to be ridden without wax on the area it covers, which is the point of fitting one where the back foot works. Keep wax off the pad itself: wax fills the diamond pattern and the surface stops biting. Wax the rest of the deck as normal.